Sunday, May 17, 2020

Slot Cars - Mini Table Scenery

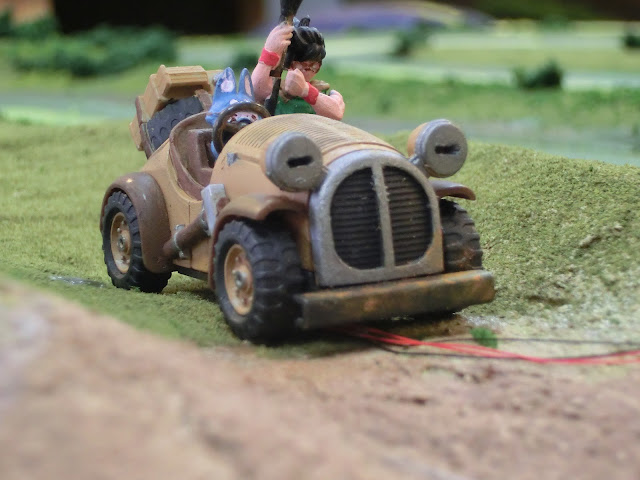
A busy week working on these little models to be dotted around the track for part of the scenery.  All from a series of Dragonball models - except the one Gundam of course.  Visible at the moment are some wires.  These will be hidden and wired to a controller in the coming week.  The intention is they will all light up with different patterns to signal completion of a lap and another pattern for fastest lap.

The van.

Bunny girl in a hovercraft.


The roadster.

The motorcycle.

The monocycle.

And of course the killer robot!

Once this is all wired up the landscaping can be finished off and racing can begin.

Laser - Desk Tidy Tape and Clips

I am slowly but surely tackling the problem of the most untidy desk drawer I ever had.  It is just one big open space with everything chucked in there.  Time to get organized.

I already made 3 simple enclosures to keep my glasses safe.  Normal, reading, and hobby glasses now all have their own clean little segregated areas.  Now to tackle some of the other bits.
Clipper and tape are not so bad, but those little clips are everywhere, so they need to be sorted.

A couple of hours planning in my head and using Solid Edge software, I marked out some parts and crossed my fingers I had it right.


Too late now,  I either got this right or I have some firewood.


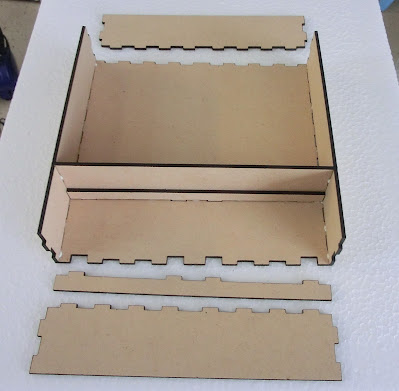
Time to assemble.

So far so good.

The nice thing about the laser is this type of wood stitching joint.  It is so accurate everything just slots together nicely.  A little dab of glue and it is done.

So accurate, you need to sand the final insert a bit.  The fit is perfect, but this piece needs to be removable with ease.  So the lightest of sandings.


All done for now.  Clipper and tape have a new home, and storage for those clips too.


Tuesday, April 14, 2020

Laser - Paint Station Project

This was a mini-project I completed one morning.  I had been doing a few models for painting and assembly at my desk.  The desk was getting a little cluttered and at real risk of me knocking a paint pot over creating an unwanted desk art 😒  Added to this, more than once I have been on hands and knees looking for a small screw or piece of model that I had dropped.

Enough was enough, time to get organized.  The following was done around a basic requirement for the work area.  This had to be the size of an A4 sheet of paper.  More than enough for the scale models and projects I work on.  So work area mapped out, add in some room for tools, paint pots and a loupe and I had the base.

Next to create the sides and locations for the paint pots to be kept securely.  A tight plan here as needing to try and keep the restraints of the whole project coming out of two sheets of 300mm x 400mm MDF.

A quick bit of assembly and dabs of wood glue and all done!

Here is where my limitation of the A4 size comes in to play.  it is now a simple job to keep the work area clean.  Once it becomes covered in paint, just drop in a fresh piece of A4.  All those tiny pieces can now be kept on a nice clean area and easy to see, harder to knock off the desk.  Paint pots will now also have less chance of tipping over.  The loupe is a clip on type and snuggles neatly between the paint pots and onto a piece of MDF between them.

A good mornings work.

Tuesday, April 7, 2020

Slot cars - Dragon Ball 5

So when thinking about the scenery for the new table, I wanted to add some quirks to it.  Sure a rally scene with mud, grass, and stone.  But also something a little off track :)

I found this - or at least part of this, in the Mech Collection Dragon Ball series.  A set of cheap little kits all with characters and different vehicles.  These I thought would be good in a little scene, even better if things like the headlights could work!

First one completed is Volume 5 - Yamcha's Mighty Mouse.

Trust me, fitting tiny LED's into the headlights was a task for these ham fists of mine, but hopefully be worth it in the end.

Wednesday, April 1, 2020

Slot cars - track test

I have been slowly so slowly working on the track, but finally made some noticeable headway.  First I smoothed out the joins with the individual pieces of track for smooth transitions.  Then applied a basic layer of paint to seal the surface and mark my general areas of scenery to come later.  Then came the trickier part, putting the wire down.  The plan of putting glue into the groove and then rolling the wire in for a tight fit did not exactly work out.  The wire still wanted to rise free of the track.  So this ended up being a case of using some weights to keep it in place until dry and then move on to the next section.

But in the end, it was worth it. Each power line was one continual smooth piece of copper wire.

Once this was in place, well you have to test it, don't you?


Not too bad for a first test while there is still a lot of tidying up and cleaning needed on the wires and guide slot.  The next step before getting heavily into the scenery and details is a few minor tweaks to the track.  

Adding some extensions to the entrance and exit of some of the corners for a little extra drift time.
And also a little on the inside of some corners where there is a transition just before it.

Time to get back to the laser and cut some little pieces!

Sunday, March 15, 2020

Slot cars - build progress

Well, it is a lot of time spent waiting for the laser to cut the pieces, then more and more of the same.  Each section is 3 pieces of MDF to get the right depth for the guide, and then a firm base to hold it together.

Base pieces were all offset by about 1cm.  This allows them to be joined together fairly strongly as opposed to just bonding them where the edges meet.  Two different lengths of straights and 2 different radius curves.  180-degree curves and also small section curves to get a mix of corners.  Last but not least, a special straight with an 18mm hole for the car sensor.

Now all put together I can't wait to clean it all up, vary the heights, paint it and get the power on it.


Sunday, March 1, 2020

Slot Cars - testing the design.

Now that I had my idea for using the laser to help build a new track with new power lines, I needed to test how this would actually work in practice.  So I made a small circular track for testing.  I used some useful feedback from those good folks over at the Slot Racer forum to tweak the design by making the groove for the copper wire slightly smaller than the wire diameter.  This helped for building the track.  I could now apply glue into the groove and then use a roller to force the wire into the groove.  This meant that friction could hold the wire in place while the glue set.


I did try to add some surface texture to the track, but this didn't work out too well and will skip this for the actual track build.

One concern raised was that the raised wire may lead to excessive braid wear, so fresh braids in and time to test run for a couple of hours.


Running..


After a couple of hours going in circles, the braids don't look too bad.  

Braids after running.

I'm calling this a pass and will now start making a few different variations on track pieces and start putting together the new layout.